Soldering training kit v1.2 - Arduino and MicroPython Mini Lab
- Learn soldering
- Create an Arduino Mini Lab
- Learn Arduino's fundamentals (Arduino UNO)
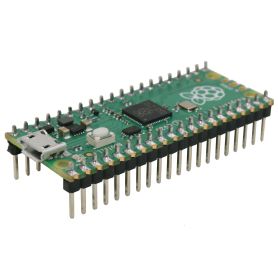
- Learn MicroPython fundamentals (Raspberry-Pi Pico, PYBStick-RP2040)
Payments are secured by LyraCollect, a French payment collection company.
It is possible to delivered to your home, to a pick-up point or picked up by appointment at MCHobby
We prepare, pack and ship your orders with great respect and care.
Solder training kit and mini labs for Arduino & MicroPython
This product is a STEM learning kit for classroom/workshop designed around soldering training to assemble a mini experiment laboratory.
Since it is also a mini experiment laboratory, you can also use it to learn fundamentals of Arduino or MicroPython with Raspberry-Pi PICO or PYBStick-RP2040 or Pyboard
It is a nice add-ons to creates training/learning/STEM/workshop activities.
This kit contains the basics components that you will often meet in the maker world.
This is made of two main parts:
- Part 1: (optional) the various components can also be tested onto a breadboard with wires... a nice way to discover the fundamentals of electronic prototyping.
Such components can be used to experiment with digital IO, analog input, PWM output. - Part 2: solder the components onto the PCB board included with the kit. Once the mini-lab assembled, just make the various connections to target microcontroler (Arduino or MicroPython) with wires and start examples sketch/script.
Once assembled, this board can also reside in you toolbox. Indeed, it is always useful to have components board ready to use! LEDs, bouton, potentiometre, temperature and buzzer quicly wireable and ready to use is always handy.
Content
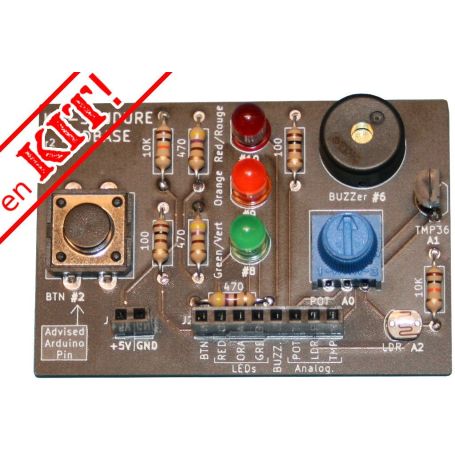
The Mini laboratory to be assembled contains the following components:
- 1x KIT-SOUDURE-ARDBASE PCB : where you can solder the various components.
- 3x LEDs : red, orange and green to create a cross road light or as user feedback from the program.
- 1x momentary push button : discover the principle of pull-up resistor (10 KOhms) and the protection resistor (100 Ohms).
- 1x Piezo Buzzer : to alert the user, discovering the sound modulation, play tunes or even creating a Theremin with the help of the phoro-resistor (LDR).
- 1x 10KOhms potentiometer : to discover analog inputs and multiple applications (configuring a delay timer, sound frequency, LED brightness, set a reference voltage.
- 1x temperature sensor : the TMP36 is an analog temperature sensor. It can be used to measure the room temperature, create a basic thermometer with the 3 LEDs, set a reference temperature with the potentiometer and then control heating process with yout Arduino.
- 1x photo-resistor : also named LDR, this device is sensitive to light. This sensor is not very precise but can detect if the room is lighted or dark (then your Arduino can switch-up a night light). The sensor can also be used as a proximity detector (if a object is close of the sensor then the sensor will receive less light).
- 3x 470 Ohms resistor
- 2x 100 Ohms resistor
- 2x 10 KOhms resistor
- 1x 2 pins female connector
- 1x 8 pins female connector
Tutoriels
- Soldering introduction : in french with tips & tricks and advises when making your first solders.
- Assembling the kit : small tutorial showing, step by step, the board assembly (MChobby, wiki, French).
- Project GitHub (GitHub, MCHobby).
Arduino Wiring + Examples Sketch,
MicroPython Wiring to Pico/PYBStick-RP2040 + Examples Scripts - Soldering Video - part 1 (youtube, MCHobby, French)
Some tips & tricks for easy soldering. - Soldering Video - part 2 (youtube, MCHobby, French)
Followup of the first video. - How to choose your iron (youtube, MCHobby, French)

