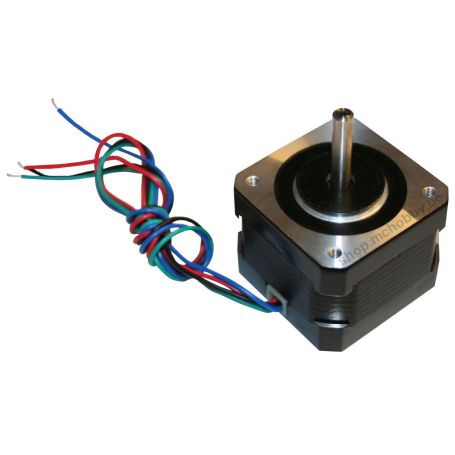


Stepper motor - 200 step - 1.3A @ 2.8V
A set-by-step motor:
- 4 wires, bipolar
- 1.8° per step,
- 200 step per revolution
- 2.8V - 1.3A per coil

Payments are secured by LyraCollect, a French payment collection company.

It is possible to delivered to your home, to a pick-up point or picked up by appointment at MCHobby

We prepare, pack and ship your orders with great respect and care.
Low voltage stepper motor oriented toward CNC / Robotic application
Here a new stepper motor for our stepper product line. This one is clearly oriented toward robotic application and CNC machines. It is a bipolar stepper with 4 wires designed for a 1.3A coil current under 2.8V.
This kind of motor can be used with a stepper motor controler that can actively limit the current into the coils (like the stepsticks). Thank to current limitation, the motor can be used at a higher voltage without burning the coil. A higher voltage means higher magnetic field and more reactive motor. In this case the current must be limited to 1.3 A.
As many other motor this one have 200 steps per revolution (so very common), each step correspond to an angle of 1.8° par pas offering smooth movement with enough torque for various application. Use it with a stepstick to take the advantage of MicroStepping where each step can be divided into 1/2, 1/4, 1/16, ... sub steps. The number of sub-steps depends on the selected step-sticj and its configuration.
As this motor use a very low voltage, you cannot control it with an Arduino motor shield (or other usual motor controler) but you can use it with stepsticks since they can actively limit the current into the coil (so we don't really have to care about the applied voltage).
Features
- Voltage: 2.8v
- Curent/Coil: 1.3A
- Resistor: 2.1 Ohms
- Inductance/Coil: 2.5mH
- Holding torque: 22 N*cm = 220 N*mm = 0.220 N*m (2.2 Kg*cm)
- Number of wire: 4
- Rotor inertie: 35 gr-cm^2
- Weight: 220gr
1 newton-mètre est égal à 100 N-cm, ou 10.1971621298 kg-cm (la force exercée par un poids de 10Kg au bout d'un bras de 1 cm).
General behavior
- Wire length: 20 to 23 cm
- Angle: 1.8°/pas, 200 steps per revolution
- Isolation resistor: 100 MOhms min, 500V DC
- Dielectrique: 500 VAC, 60 sec max.
- See also datasheet.
Tutoriel
- Utiliser un StepSick A4988 (contrôleur de moteur pas-à-pas) avec un moteur pas-à-pas.
All stepstick are working in a similar way.