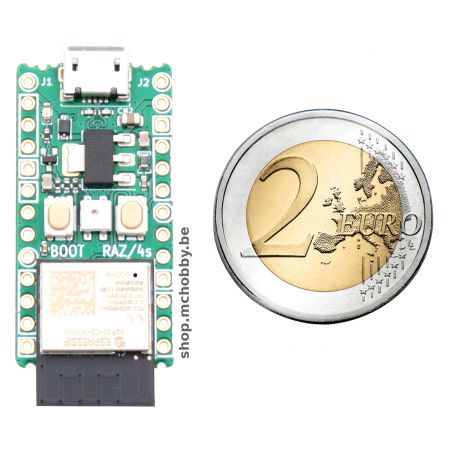
PYBStick26 ESP32 C3 - MicroPython - microUSB
PYBStick 26, ESP32-C3
- MicroPython Ready
- 26 pins / 13 GPIOs
- ESP32-C3 (Risc-V, 1 coeur)
- 160 MHz
- 4 Mio Flash
- 400 Kio RAM
- microUSB
- RGB LED (APA106)
- 3.3V Logic
Payments are secured by LyraCollect, a French payment collection company.
It is possible to delivered to your home, to a pick-up point or picked up by appointment at MCHobby
We prepare, pack and ship your orders with great respect and care.
PYBStick26 ESP32-C3: an affordable MicroPython WiFi board for all your connected projects
Here is the new PYBStick from Garatronic, this one is based on ESP32-C3. An ESP32-C3 is an ESP32 with Native USB support. As a result, it is possible to connect the microcontroller on a computer via USB without sacrificing a UART on the ESP32. This also makes it possible to use this board as an USB-Serial converter.
And necessarily, as it is an ESP32, the platform has WiFi connectivity.
With the PYBStick 26 format, we have a standard 26-pin interface offering:
- ESP32 C3 Mini 1
- 3.3V Logic
- 32 Bits Risc-V, 1 Core @ 160 MHz
- 384 Kio ROM
- 4 Mio Flash
- 400 Kio SRAM
- 8 Kio SRAM (RTC) - 1x Port USB-Serial
- 13 GPIOs
- 13x PWM output
- 6x analog input (ADC)
- 1x serial port (UART0)
- 1x bus I2C (bitbang)
- 1x bus SPI
- 1x LED RGB APA106 (GPIO 8)
- USB: micro USB
- Compact format
- WiFi 2.4 Ghz - 802.11 b/g/n
- Bluetooth 5
- ESP32 C3 Mini 1 datasheet (pdf)
With MicroPython, Flash memory is used to store MicroPython firmware as well as Python files to run on the microcontroller. The card is equipped with the USB connector (type A), which allows the PYBStick to be connected directly to a computer to be programmed... The PYBStick is presented as a USB key, this connector allows the card to be powered but also to expose a serial port to communicate with the computer as well as an interactive Python command interpreter called REPL.
The REPL command interpreter of MicroPython offers the following possibilities:
- View the messages printed with the MicroPython print() statement,
- Interacting with script currently running on the board (stop the script, inspect variable state, and so on ...)
- Testing a script currently under developement (using import statement to load a script on the fly).
- Key-in Python statements and inspect the results De saisir des instructions Python pour tester des fonctionnalités de la plateforme microcontrôleur de façon interactive.
Note:
The platform is initialized with a minimalist script making the LED illuminates in white, blue, red for 10 cycles.
This script can be interrupted by using CTRL-C in a REPL session (or by pressing the [Stop] button in Thonny-IDE).
It is possible to disable the sample script on the platform using the following commands from REPL.
import os
os.remove('main.py')
Development tool
MicroPython does not need any development tools, a simple text editor is enough to write a Python script.
On the other hand, you will need a tool to transmit Python script on the MicroPython platform.
For this you can use one of the following Thonny IDE, MPRemote, RShell, Ampy.
Thonny IDE is a complete and very user-friendly environment that supports many MicroPython platforms.
The other tools are used from the command line (sometimes more intimidating but just as useful).
The MCHobby wiki do contains lots of MicroPython tutorials (written in French) for many plateforms.
MicroPython and UART
L'UART0 doesn't look to be available on the GPIO 20 and 21 (on the default location). However, it is possible to use the UART1 on those GPIOs.
uart0=UART(1, baudrate=9600, tx=21, rx=20)
See this discussion thread for more information.
Tutorials
- MicroPython Page (MCHobby, Wiki, French)
- Ressources PYBStick26-C3 (Pyboard-driver GitHub)
- MicroPython drivers for various sensors divers capteurs (esp8266-upy Github, MCHobby)
- MicroPythonn ressources (Pyboard-driver GitHub, MCHobby)
- MicroPython.org (informations et forums)


