
IR Break Beam Sensor - 5mm LED
IR Break Beam Sensor - 5mm LEDs

Payments are secured by LyraCollect, a French payment collection company.

It is possible to delivered to your home, to a pick-up point or picked up by appointment at MCHobby

We prepare, pack and ship your orders with great respect and care.
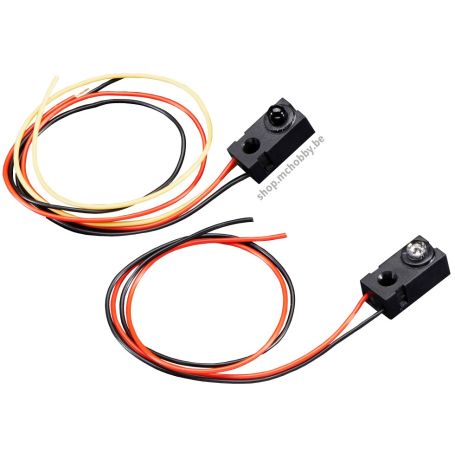
Description
Infrared break-beam sensors are an easy way to detect motion. They work by using an emitter side that sends out an Infrared beam (not visible for human eyes), then a receiver across the way to a sensor which is sensitive to that light.
When something passes between the emetter and the sensor (something not transparant to IR), then the 'beam is broken' and the sensor can alert your project.
Compared to PIR sensors, breakbeams are faster to detect. You also have a better control of where you want to perform the detection. They are less exepensive than a Sonar module.
However, you do need both emitter and receiver on opposite sides of the area you want to monitor.
This is the 5mm IR version. It works up to 50cm.
Wiring
You can power it with 3.3V or 5V. However, we recommend to use 5V because it will get you better range.
The receiver is open collector transistor output. You will need a pull up resistor to read the signal on a digital pin. Most microcontrollers have the ability to turn on a built in pull up resistor.
If you don't have this capability on your microcontroler then connect a 10K resistor between the white wire of the receiver and the red wire.
The transistor output can sink up to 100mA to ground.
Technical details
- Sensing Distance: ~25cm
- Power Voltage: 3.3 - 5.5VDC
- Emitter Current Draw: 10mA @ 3.3V, 20mA @ 5V
- Output Current Capability of receiver: 100mA sink
- Transmitter/Receiver LED Angle: 10°
- Response Time: <2 ms
- Dimensions: 20mm x 10mm x 8mm / 0.8" x 0.4" x 0.3"
- Cable Length: 250mm
- Weight: 6g (for both item)
- Datasheet
Tutorial
- IR Breabeam sensors (IR Breakbeam, Anglais)


