


Pico2 Base - Découverte et exploration de l'électronique avec MicroPython
Pico2 Explorer - Exploring electronic with Raspberry-Pi Pico2
- Pico 2 with Header
- Buzzer
- Photoresistor, Temperature, Potentiometer
- Buttons
- Red, Orange, Green LEDs
- MicroPython Ready

Payments are secured by LyraCollect, a French payment collection company.

It is possible to delivered to your home, to a pick-up point or picked up by appointment at MCHobby

We prepare, pack and ship your orders with great respect and care.
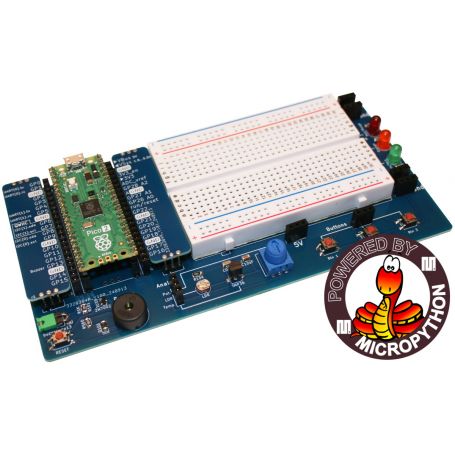
Pico2 Explorer - discover electronic with Raspberry-Pi Pico2 and MicroPython
The Pico 2 Explorer is a laboratory for experimenting with fundamental programming and electronics. Pico 2 can be used with any programming language (MicroPython, Arduino, Lua, Javascript, CircuitPython). This laboratory is designed around MicroPython and involves pre-wired components to facilitate the first electronic experiments with Pico 2 and MicroPython.
Like any laboratory worth its salt, the tools are reusable! Any experienced user knows that it is useful to have LEDs and buttons at hand. A potentiometer can be used as a setpoint and, finally, the buzzer will be an excellent alert tool.
The Pico-2-Explorer was designed to facilitates electronic discoveries!
Simplified wiring
Accompanied by tutorials, the user will learn how to use the different electronic components present on the board.
The components are pre-assembled so that only one last wire will be necessary to discover your first components.
Discovering electronics without having to worry about resistors, wires, polarity problems, breadboard, etc... it's so much simpler!
The microcontroller is preloaded with MicroPython, the necessary example scripts and libraries, the whole thing is ready to use.
Start Thonny IDE, plug your Pico into your computer and test the first examples.
Top readability!
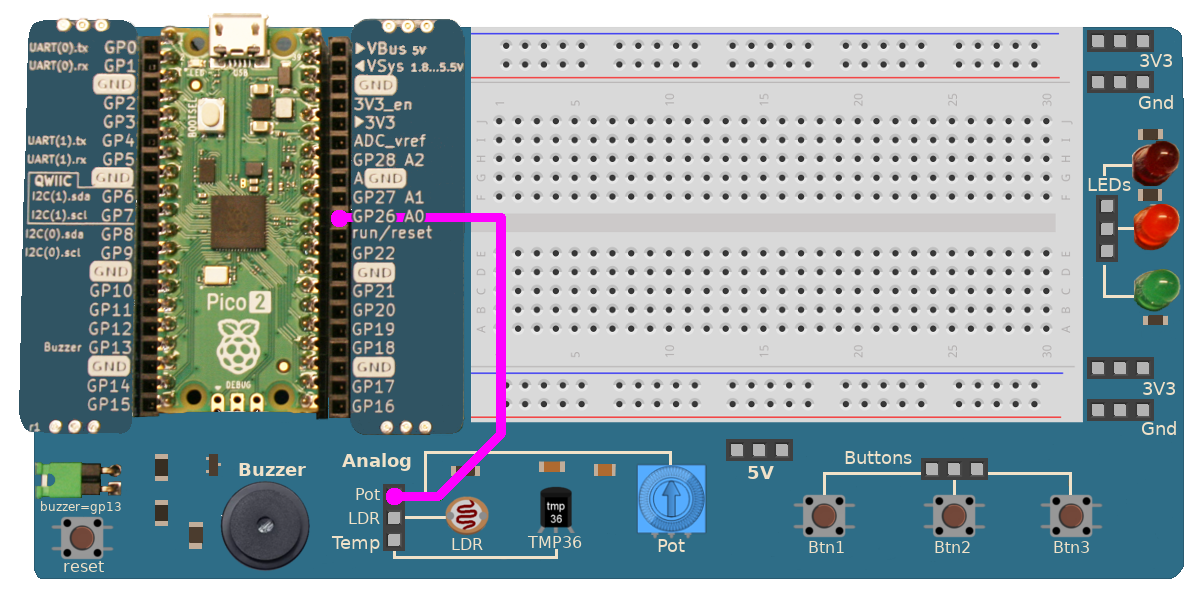
There is only one wire to connect for your first experiments (the common ground is already wired on the board).
We also found a very neat idea to facilitate the connections! By placing the label right next to the connector, there is no more parallax issue!
That eliminates the risk of getting the wrong hole on the Pico by taking the one next to it!
.jpg)
Some GPIO labels also include the mention of alternative functions.
More clarity = fewer errors!
.png)
The connectors of the board components are logically grouped in the same area.
Once again, this makes it easier to identify the connections. You will find an "Analog" connector near the analog components, an LED connector near the light-emitting diodes, etc.
Components with multiple uses
The purpose of the Pico 2 Explorer is to learn. Therefore, the choice of included components is geared towards simplicity while offering versatile use.
.jpg)
- Red, orange, green LEDs: use them to create a three-level indicator, a three-color traffic light, simulate the start-up of a device, etc.
- Three push buttons: to create a simple and effective user interface.
- A potentiometre: ideal for discovering the analog world. The potentiometer allows you to set a temperature, direction, brightness, sound volume, etc.
- A photoresistor: (analog) whose resistance changes depending on the incident light. Also allows you to create a presence detector, a passage detector, detect the night, etc.
- A temperature sensor: (analog) the famous TMP36 is a component allowing to evaluate the temperature in degrees Celsius, Fahrenheit. It can be used to create thermometer, a thermostat or a data-logger..
- A buzzer: this vibrating element allows you to create sounds and musical notes. With an adequate library, the piezo buzzer can also produce melodies. The buzzer is connected directly to the GP13 pin. The GP13 can be freed by removing the jumper.
- A Reset button: cruelly missing on the Pico, this button will prove useful during your testing phases.
Mini-projects
The features of the Pico-2-Explorer are covered through multiple examples covering the digital and analog worlds with a detour through pulse width control (PWM).
It also features additional mini-projects:
- The fastest game
- Automatic night light
- Chime (rings every hour, 1/2 hour and 1/4 hour)
- Melodic bell
- Binary die
- Theremin buzzer
- Heating thermostat
- Temperature and light datalogger.
Advanced Usage
Once familiar with the fundamental concepts, the user will be able to continue his own discoveries and experiments around the Pico 2, MicroPython and electronics.
Other electronic or analog components will allow to explore various physical phenomena or to discover further the possibilities of electronics combined with MicroPython.
The Pico-2-Explorer also offers:
- The breadboard: allows you to easily and quickly connect one or more components to be tested with Pico-2-Explorer.
- The power connectors: the breadboard comes with 3V3 and GND power rails (3 points each) to easily power the breadboard distribution rail. An additional 5V power rail (from USB) is available under the breadboard.
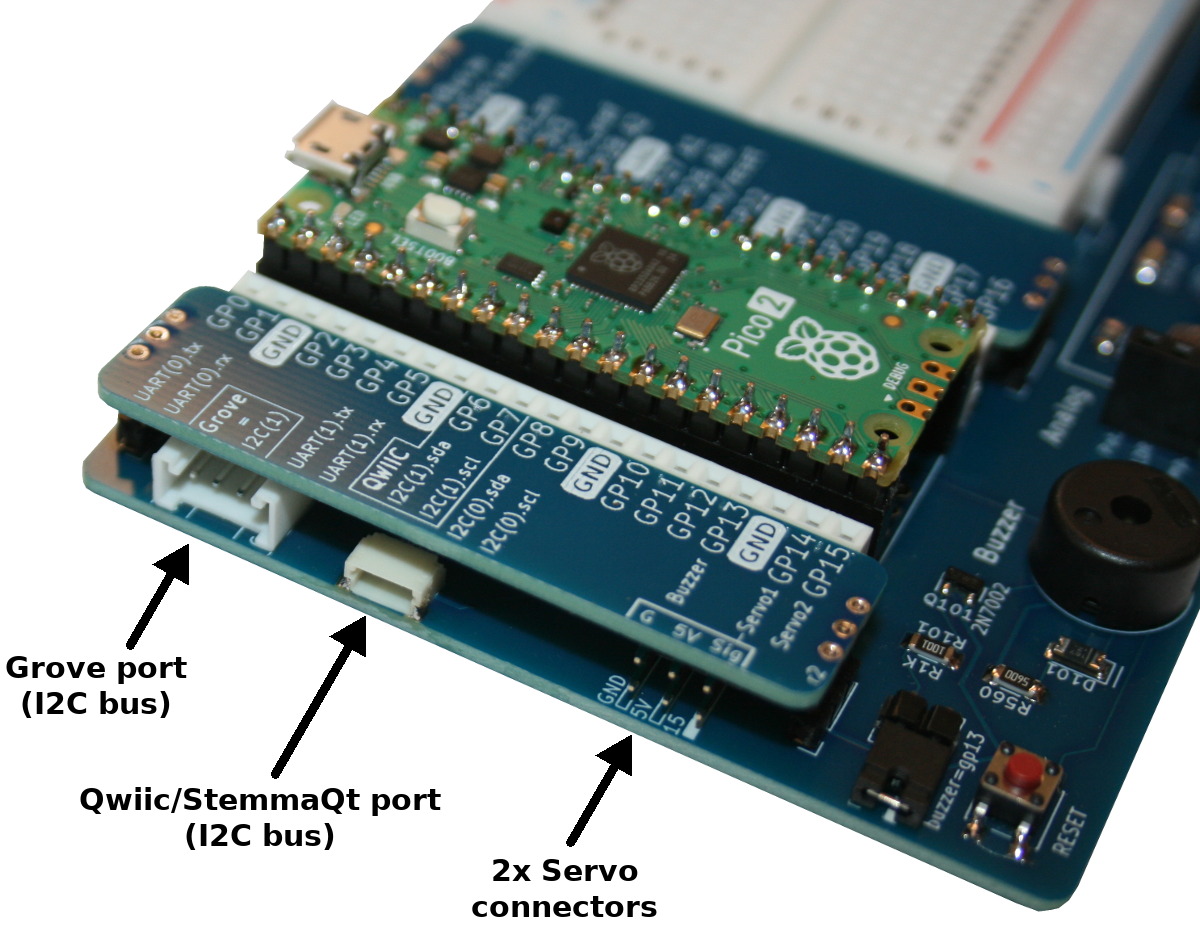
- The Qwiic connectors: SparkFun's Qwiic connector (also called StemmaQt at Adafruit) carries an I2C data bus (sda, scl) and a 3.3V power supply.
This very common bus in electronics allows you to chain several I2C sensors or actuators together on the same bus.
Among the best known are the BMP280, BME280 or the OLED display. Our shop offers a large number of sensor compatible with Qwiic/StemmaQt. - One Grove I2C connector: (r2) can be used to connect Grove sensors/devices. Grove is supported by SeeedStudio and M5Stack. The power is set to 3V3 by default, it can be changed to 5V thank to the solder jumper beneath the board.
- Two servo connectors: (r2) allow to connect two 5V servo motors. The motor voltage is provided via the USB.
Content
For each order, you will receive a Pico-2-Explorer and its microcontroller.
The Pico-2-Explorer is fully assembled and preloaded with MicroPython, example scripts and necessary libraries.
The Pico-2-Explorer is shipped with 10 male-male wires, so nothing needed for your firsts experiments.
The whole thing is tested and ready to use (we recommend Thonny for a first experience).
Tutorial
- Tutorials on Pico-2-Explorer (English and French)
- Pico-2-Explorer ressource (GitHub)
- Our ESP8266-upy repository with plenty of component and libraries for MicroPython (English and French)