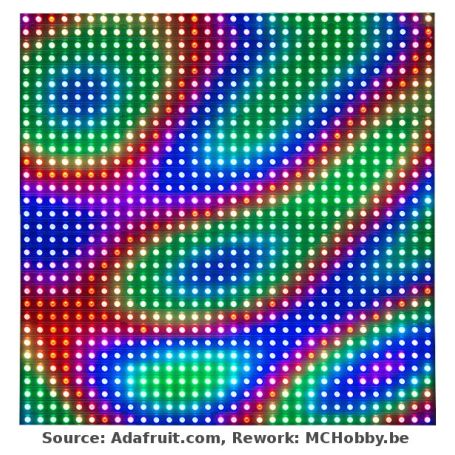


RGB Led matrix - 32x32 - 6mm spacing
RGB LED Matrix
- 32x32 RGB LEDs
- 6mm Spacing
- 190.5mm x 190.5mm (H: 14mm)

Payments are secured by LyraCollect, a French payment collection company.

It is possible to delivered to your home, to a pick-up point or picked up by appointment at MCHobby

We prepare, pack and ship your orders with great respect and care.
A 32x32 RGB matrix to create an innovative clock or Piccadilly circus
You would like to add a display to follow the news, actions, or other info in your home... a display of the kind found in Time Square (USA) or Piccadilly Circus (London) but in the size of your living room? You will certainly fall under the spell of this RGB LED Matrix. These displays are normally used to make video walls. In New York, these panels are even used on the bus side and at bus stops, they are used to display animations or short video clips.
This material looks really cool.
This version of the RGB 32x32 Matrix has LEDs placed every 6mm. Note that it isn't possible to drive such a large matrix with an Arduino UNO! Use an Arduino Mega, Raspberry-Pi, BBB or other device with enough memory to drive such a device.
The matrix is composed of 1024 bright RGB LEDs arranged in a 32x32 grid at the front. The back is equipped with two IDC connectors (one for the signal input and one for the output). In theory, these panels are chainable and 12 latches 16-bit can control the display with a refresh rate of 1:16.
These displays are technically 'chainable' - Connect the output of one to the input of the other - but the Arduino code examples produced by Adafruit don't yet support this feature.
These panels require 13 digital pins (6 data bit and 7 control bit) as well as a good 5V power supply. Each panel can consume up to 2 amperes.
Delivered with:
- One 32x32 RGB panel,
- An IDC cable,
- A power cable,
- 4 mounting screws and mini-magnets (these panels are often mounted on a magnetic base).
Keep in mind that these displays are designed to be driven by FPGAs or other fast processors: they don't have PWM control (of any kind). Instead, you are supposed to redraw the screen again and again to perform a 'PWM control' manually. On a 16MHz Arduino Mega, it is possible to manage 12-bit colors (4096 colors) with 40% CPU usage but this display will only offer the best of itself only when it is controlled by micro controllers multi-core, FPGAs, CPLD, Propeller, XMOS.
The good news is that the display has a white balance 'preconfigured' with a nice uniformity... so that if you turn on all the LEDs, the white is fairly faithful (little tinted).
You will find a tutorial of connection and use (with Arduino library and examples) to display pixels (point), lines, rectangles, circles and tests. You should be able to produce sparkling colors within the hour! On an Arduino, you will need 13 digital pins and approximately 1600 bytes of RAM to store a 12-bit color image (4096 colors).
Note that these displays come from factory stock carrying out large-scale display projects. As a result, the look and the size can vary significantly from one production batch to another even on the code, the basic operations and the tutorial remain identical.
Technical details
Here are the factory specifications.
- Dimensions: 190.5mm x 190.5mm x 14mm
- Panel weight with IDC cable and power cable: 357.51g
- Input voltage: 5V regulated, 2A max (all LEDs on)
- Logic input: 5V data logic
- 2000 mcd LEDs for spacing LEDs at 6mm
- Refresh rate: 1/16 scan rate
- Indoor display: 150 degrees of visibility
- The displays are 'chainable' - connect the output of one to the input of the other - but this feature is not supported by the Arduino library.
Tutorial
- RGB 32x16 and 32x32 matrices (Adafruit, English)
Thousands of LEDs to dazzle you! - SmartMatrix Animated GIF Player (Adafruit, English)
Create a custom viewer that displays your own GIF collection. - Creating GIFs for SmartMatrix (Adafruit, English)
Transform a high resolution video or GIFs into 32x32 pixelated GIFs - DIY LED Video Cube (Adafruit, English)
Make your own cube, an animated companion in color - SmartMatrix remote LED display (Adafruit, English)
Control a remote display to illuminate any room - Adafruit RGB Matrix Hat + Real Time Clock (RTC) for Raspberry Pi (MCHobby, French)
Make your own display at "Piccadilly Circus" or "Times Square"
