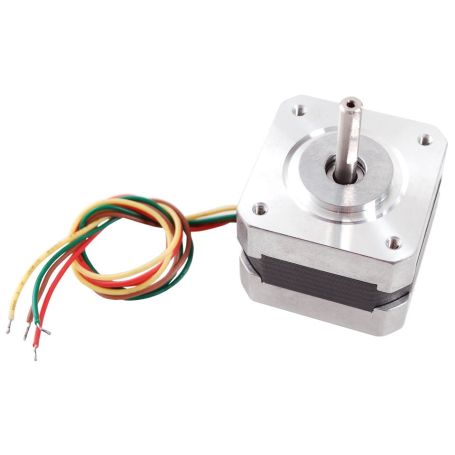


Stepper motor - 12V, 200 step (Hobbyisme) + Extra
A step-by-step motor:
- 4-wires, bipolar,
- 1.8° per step,
- 200 steps per revolution.
- 12V (still work under 5V)
For Hobbyist usage.

Payments are secured by LyraCollect, a French payment collection company.

It is possible to delivered to your home, to a pick-up point or picked up by appointment at MCHobby

We prepare, pack and ship your orders with great respect and care.
An affordable stepper motor to help your project to act on the world
Here is a stepper motor able to satisfy all the needs of a robotic/CNC Hobbyist! It is a bipolar 4-wires stepper motor. It has a rotation angle of 1.8° per step allowing smooth movements and has a sufficient torque to satisfy many applications.
In extra we offer the 4 fixation screws M3 x 6... No need to run the hardware stores to find them.
This motor can be used with a MakerBeam nema 17.
This motor has a maximum current of 350mA and can therefore be controlled using a motor shield for Arduino (or other motor controller like L298 breakout) and a 12V power supply or an acid/lead battery or a StepStick motor controller like A4988.
Under 12V, the intensive / constant usage of the motor over a long period will create a motor warm-up, enough to burn the skin. The only way to control the temperature is to have a motor driver with active current control (like the stepstick). Just power down the motor when no couple is needed.
It is a 12V stepper but -surprisingly- it operate pretty well under 5V with the motor shield for Arduino. The expected to torque is lower but will be fine for many kind of applications. under 5V, the motor warm-up is reduced to almost nothing.
Characteristics
Among the details that make the difference, this motor includes a ready-to-use cable and a machined shaft that has a flat (very convenient for attaching things).
For use with a Adafruit Motor shield you can reach 250 rotation per Minute (RPM). To connect it on this shield, use the wires in this order: Red, Yellow, Jump terminal GND/ground, Green, Brown (or gray).
- Voltage: 12v (can also operate at 5V)
- Current/coil: 350mA @ 12V (190 mA @ 5V)
- Resistor: 34 Ohms
- Inductance/coil: 4.3mH
- Holding torque: 20 N*cm = 200 N*mm = 0.200 N*m (2 Kg*cm)
- Numbers of wires: 4
- Inertia Rotor: 38 gr-cm^2
- Weight: 200gr
1 newton-meter is equal to 100 N-cm, or 10.1971621298 kg-cm (the force exerted by a weight of 10Kg at the end of an 1cm arm).
General specifications
- Wire length: 20 à 23 cm
- Angle: 1.8°/step, 200 steps per revolution
- Max temperature: 70°c
- Operating temperature: 0°C... +50°C
- Insulation resistance: 100 MOhms min, 500V DC
- Dielectric: 500 VAC, 60 sec max.
See also the technical data sheet.
Tutorial
- Arduino: Use a step-by-step motor with the motor shield in French.
- Raspberry: Order a step-by-step motor with ULN2803 in French.
- Use a StepSick A4988 (step-by-step motor controller) with a step-by-step motor.