


2 axis analog joystick + button
Analog Joystick as kit
- 2 analog axis
- Clic button
- kit (easy to assemble)
- PSP/Xbox style

Payments are secured by LyraCollect, a French payment collection company.

It is possible to delivered to your home, to a pick-up point or picked up by appointment at MCHobby

We prepare, pack and ship your orders with great respect and care.
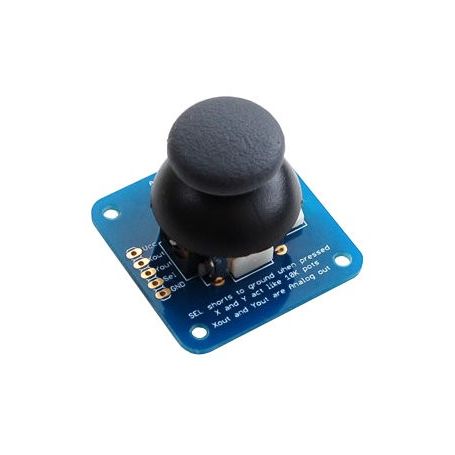
2 axis analog joystick + button
Here is a breakout in the form of an easy to assemble mini-kit. This joystick is similar to those found on the XBox or Play Station Portable game controllers.
This breakout allows you to easily add an analog joystick to your Arduino projects (or other microcontroller).
Analog joysticks are more precise and reliable than directional joysticks (using simple switches to indicate the selected direction). This analog joysticks also includes a selection button activated by pressing the joystick as a simple button.
The breakout is designed to easily attach the joystick onto it and quickly fix it on a box thanks to its fixing holes.
A 5-pin header (2.54mm spacing) allows the joystick to be plug more flexibly on a breadboard. Warning: you must acquire the pin-headers separately.
Content
Comes as a set of 3 pieces: the joystick itself, a soft-touch cap and a breakout board.
This kit requires some rudimentary soldering operations to fix the joystick on the board. This operation is simple and should not take more than a few minutes.
Wiring it on Arduino
This joystick is really ideal to operate on an Arduino platform. If you know how to read the value from a potentiometer and use push buttons with Arduino then you will have no trouble using this device.
Since it is an analog device, you will need two analog pins on your microcontroller to determine the value of the X and Y axis.
Each of the X and Y axes controls uses 10 KOhms potentiometers. Reading is therefore done as for a potentiometer (trivial).
You can detect the pressure of the button with a complementary digital pin (just need to read the state of the switch). When the button is pressed, the pin is connected to ground / GND.
A push-button type assembly (pull-up with a 10K resistor and another of 100 Ohms) will be perfect.
Technical details
- Size: 3.81cm width x 3.81cm long x 3.17 cm height
- Weight: 12 gr
- Power: any voltage up to 5 volts.
- Current: 1 milliamps @ 5 volts.